Before You Start Email Integration is Required
Before sending emails from Cerely, you must first integrate your email account. Cerely supports both Google Gmail and Microsoft Office 365 integrations.
Refer to the following guides to set up your email integration:
- How to Integrate Google Gmail - https://21773606.hs-sites-ap1.com/how-to-integrate-your-google-email-account
- How to Integrate Microsoft Office 365 - https://21773606.hs-sites-ap1.com/how-to-integrate-your-microsoft-office-365-email-account
Once your email is connected, you will be able to send emails directly from within the Cerely platform.
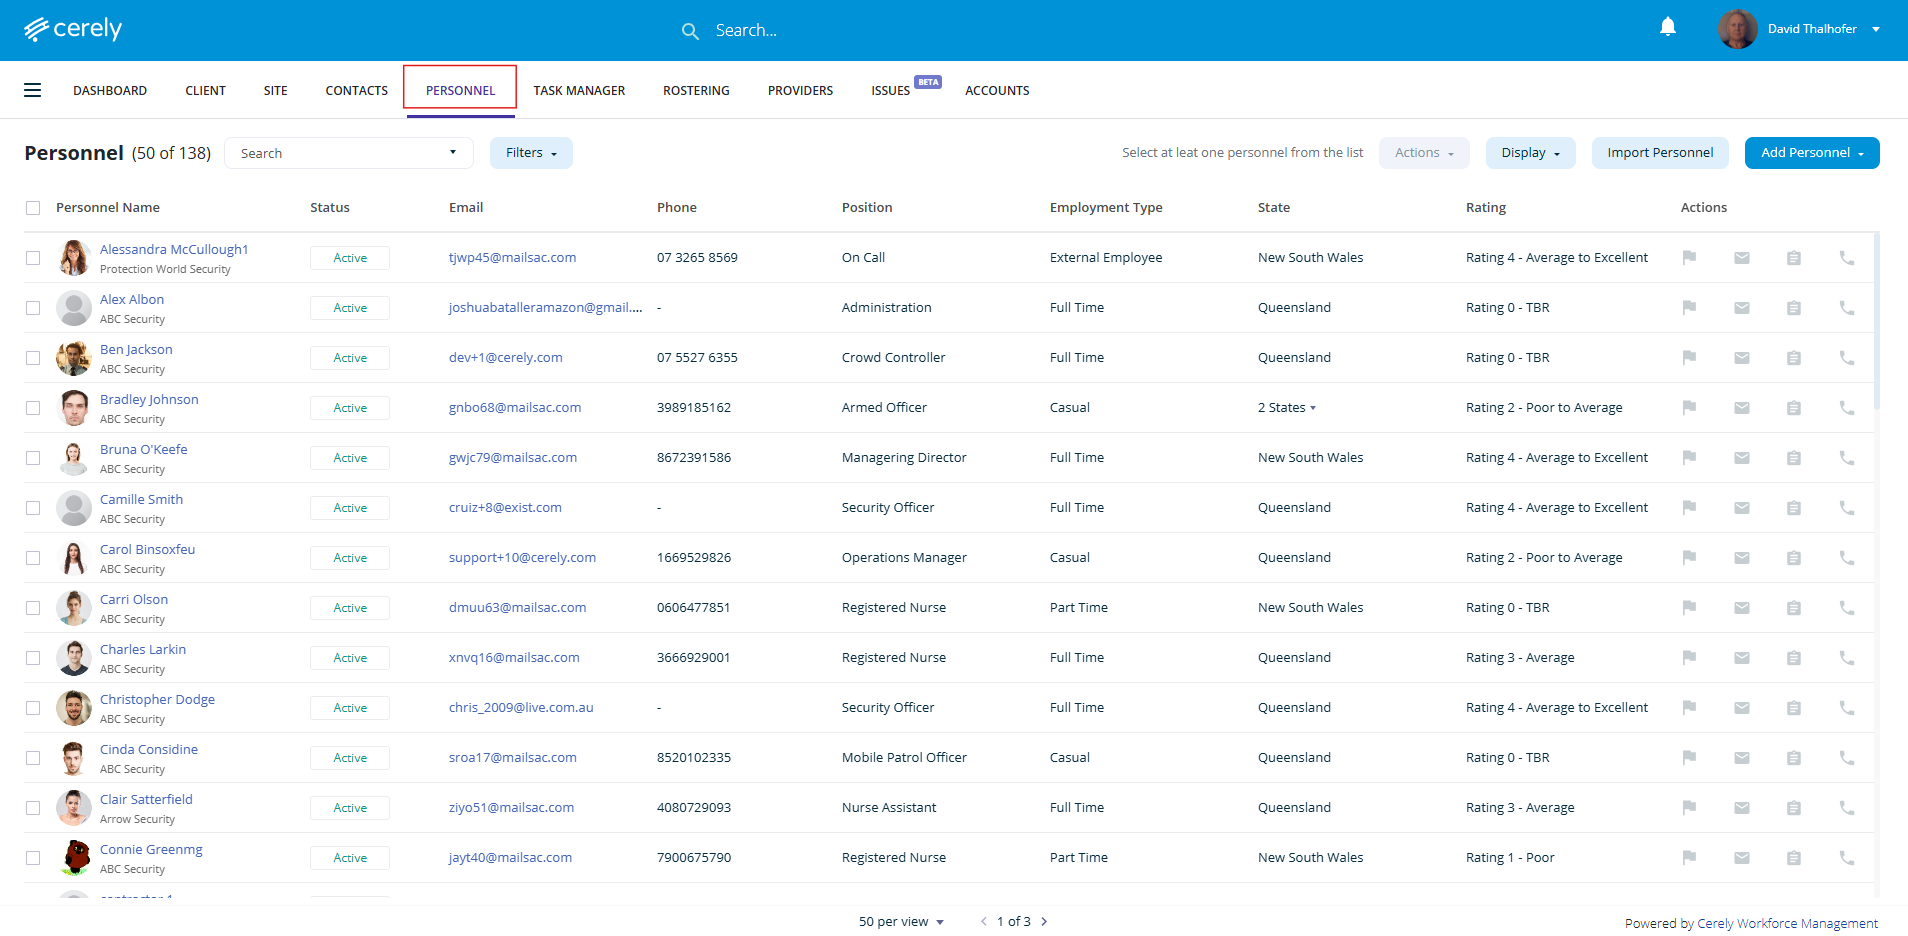
1. From the main menu on the Cerely dashboard, click on the Personnel tab
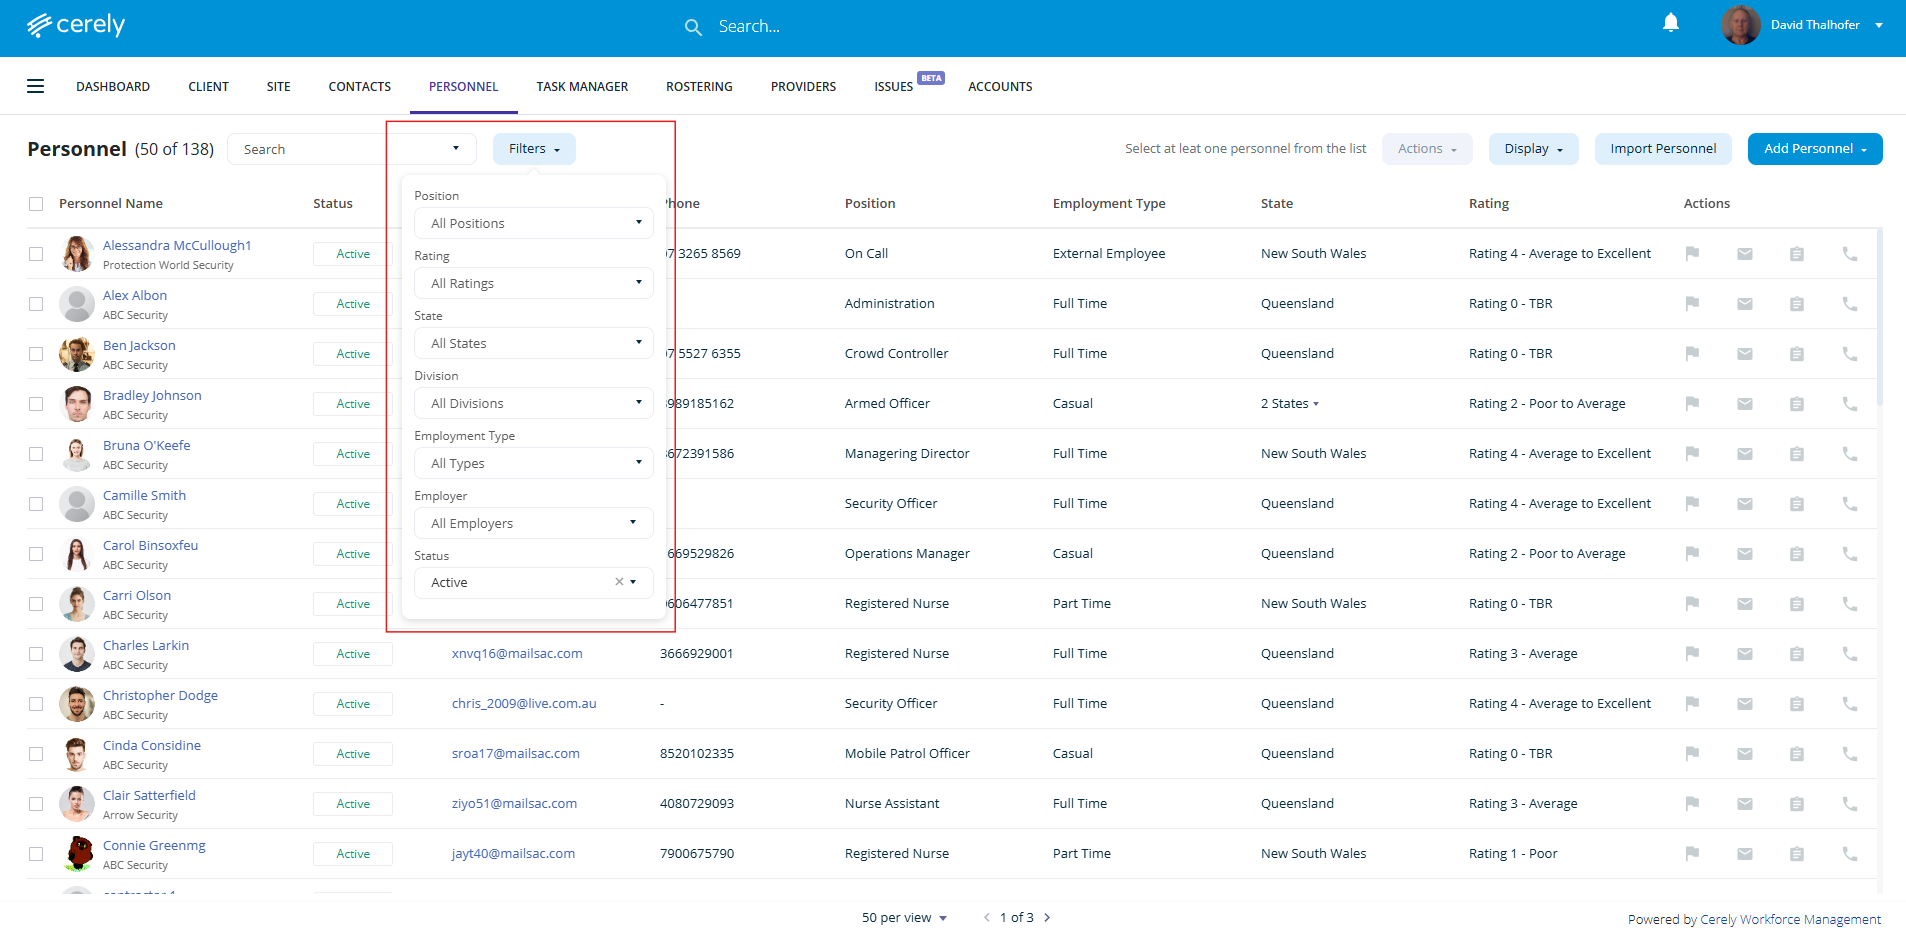
2. Use the filters at the top of the Personnel screen to select your target audience for the email communication. You can filter recipients based on:
- Position
Filter by job role (e.g., Security Guard, Supervisor, Patrol Officer) - Rating
Use internal performance or compliance ratings to target top-rated or underperforming personnel - State
Select personnel based in specific Australian states or territories - Division
Filter by your organisation’s divisions - Employment Type
Choose between full-time, part-time, or casual workers - Employer
If managing personnel under different entities or subcontractors, filter by employer. - Status
Include:- Active personnel currently employed and active in the system
- Inactive personnel who are archived
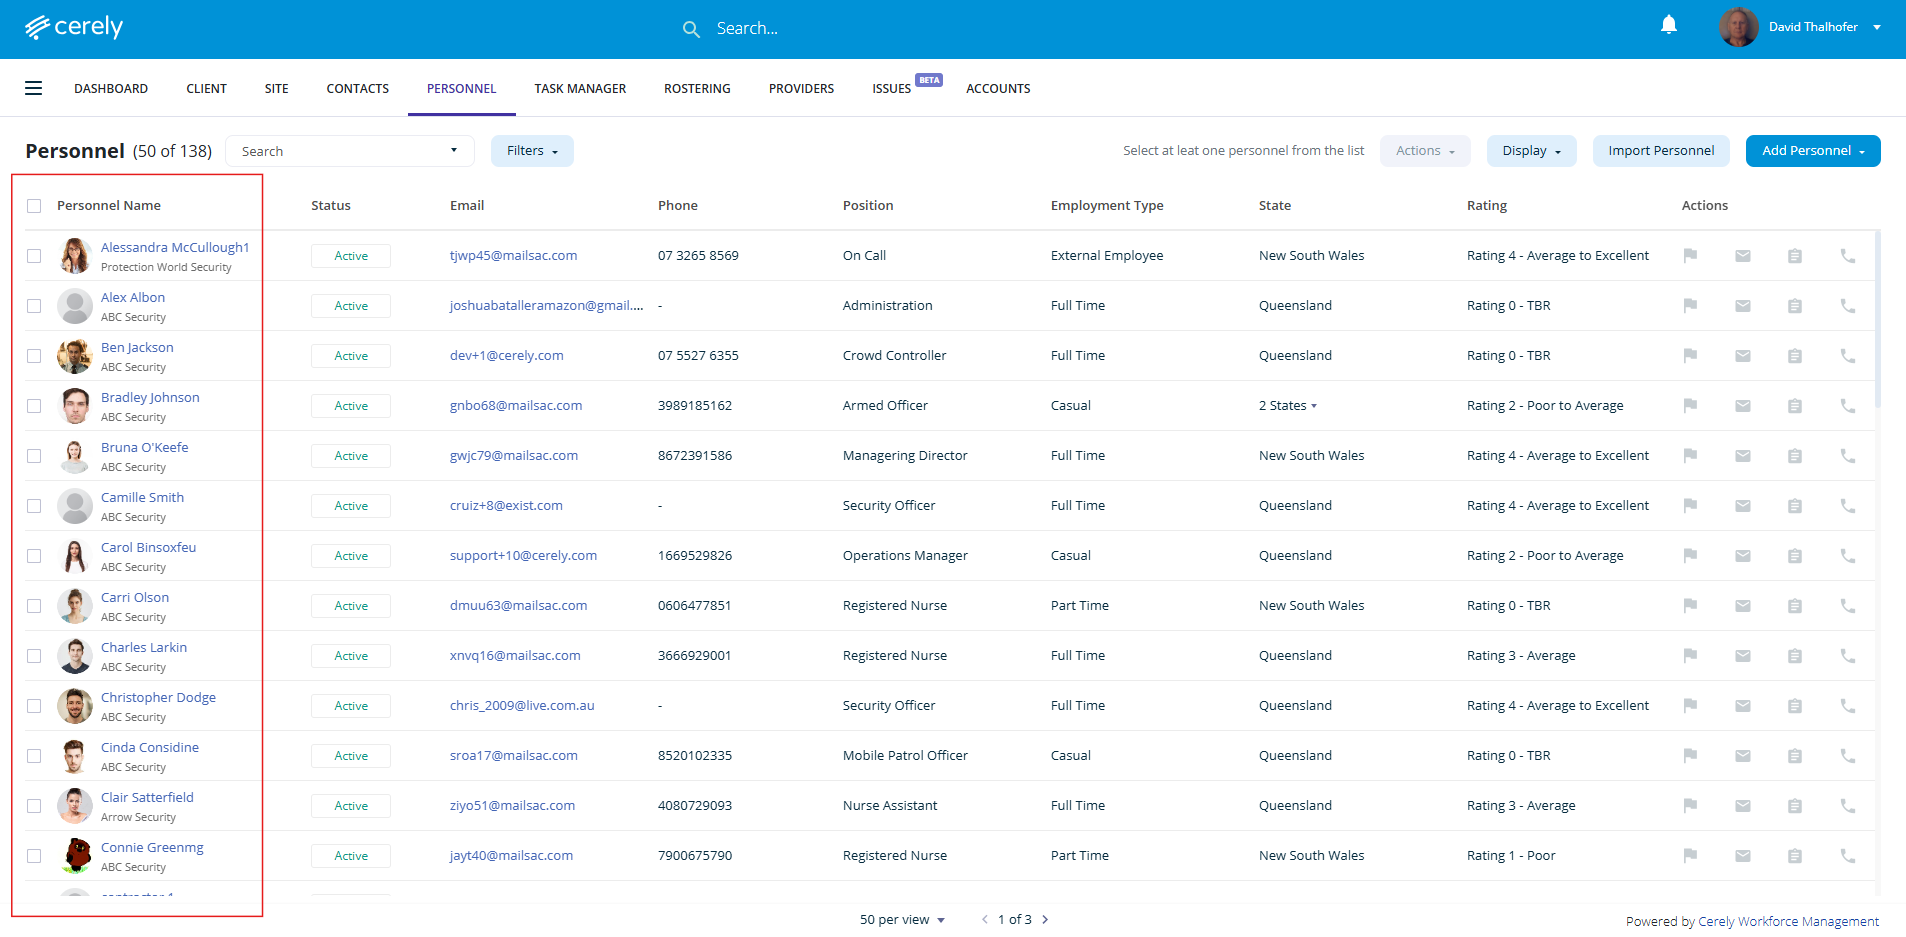
3. Select the personnel to email
- Use the select box to select all filtered personnel, or
- Manually tick individual check boxes with the team members you wish to include in the email
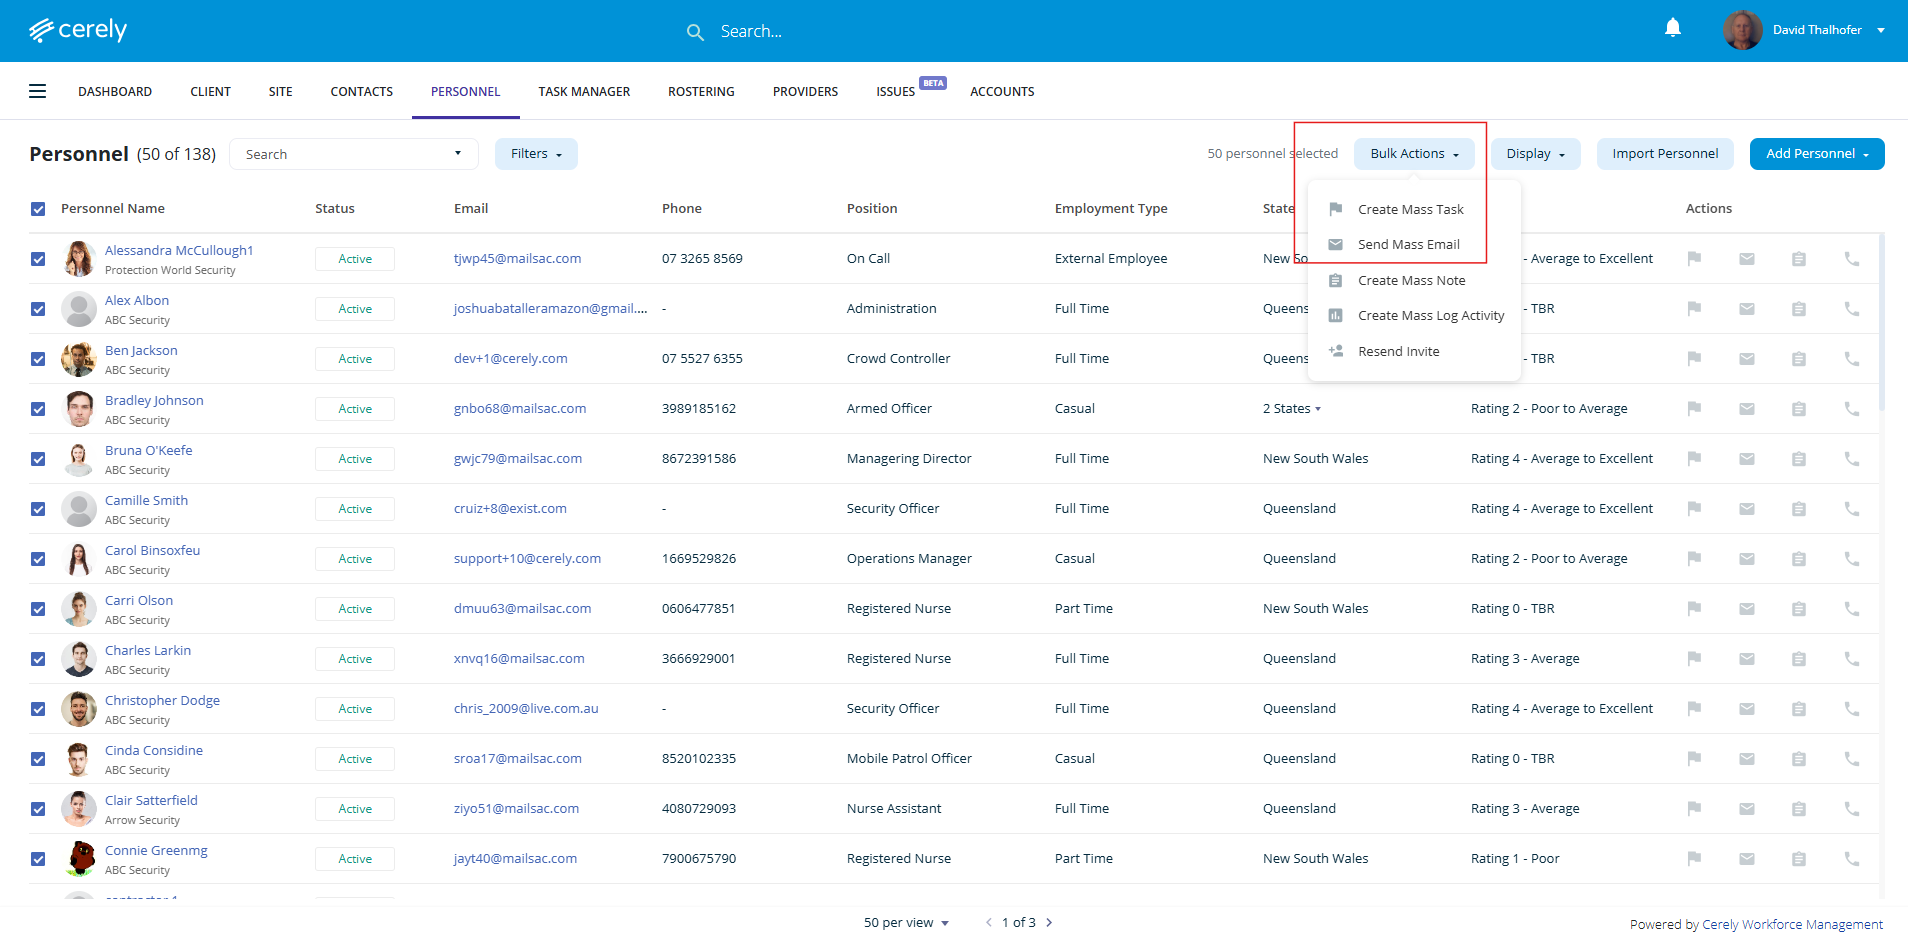
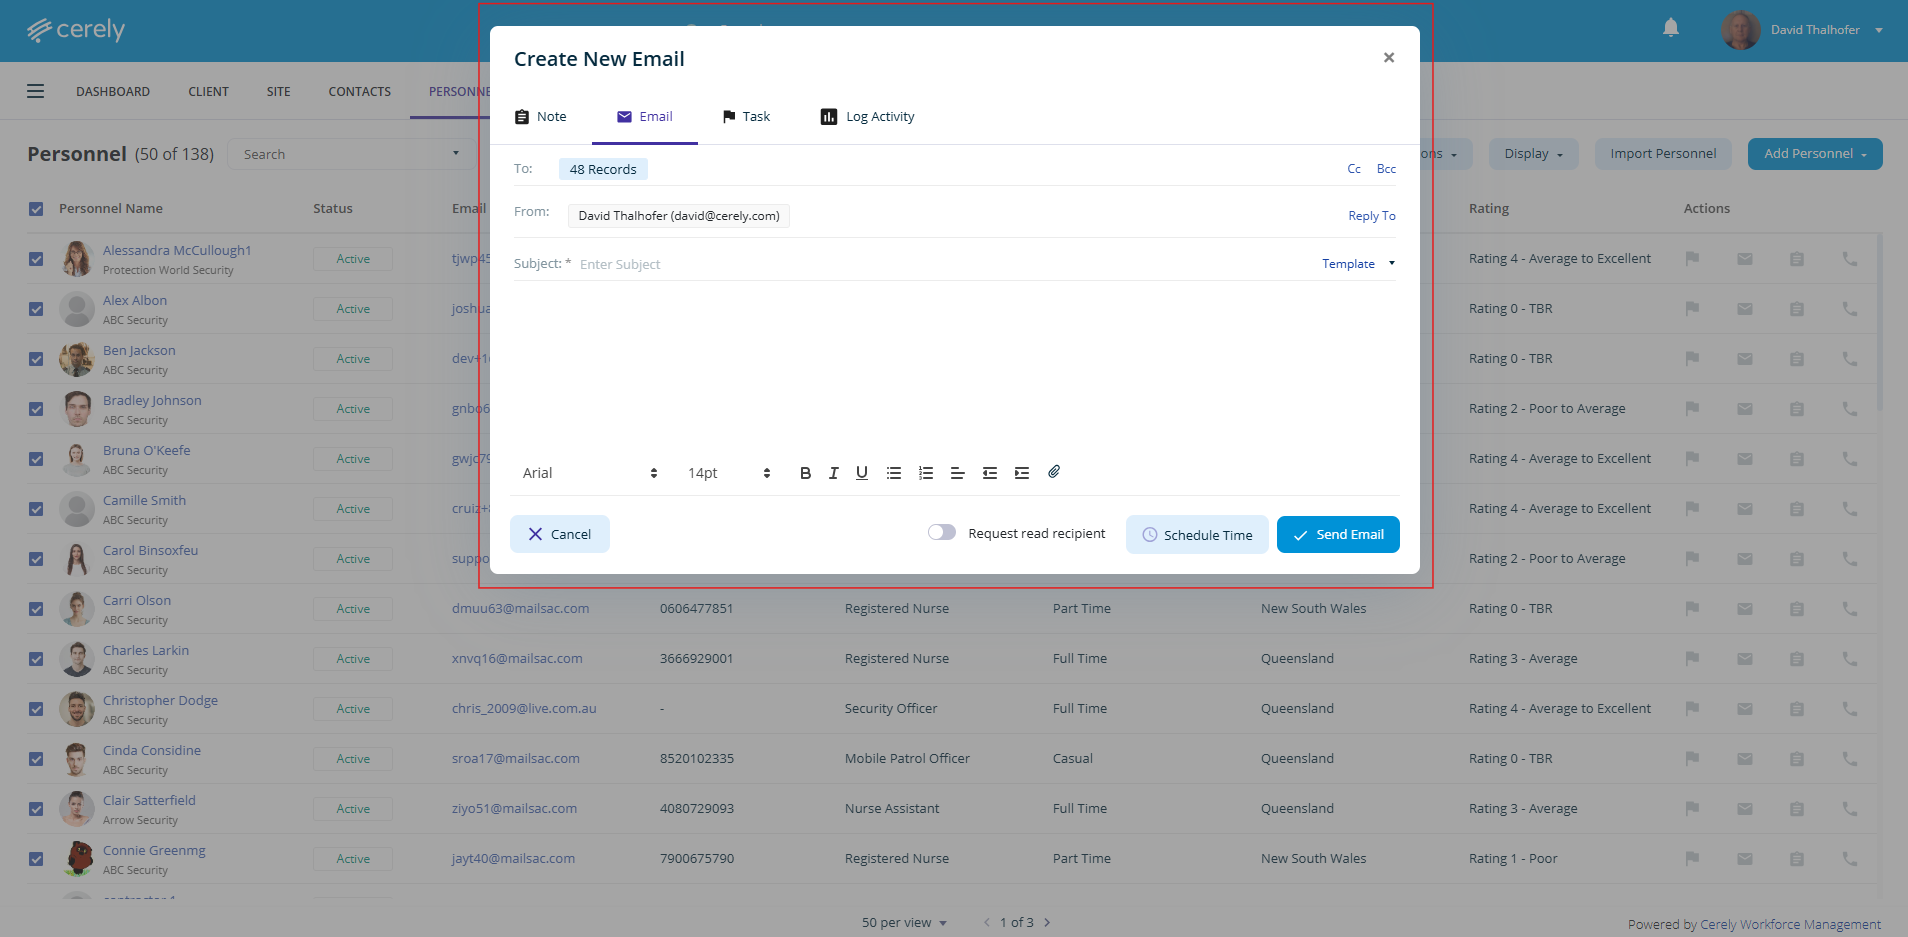
4. Click on the Bulk Actions button, from the drop down menu click send mass email
5. Compose your email
You’ll be directed to the email editor screen. Here, you can:
-
Type a custom message (e.g., schedule changes, reminders, announcements)
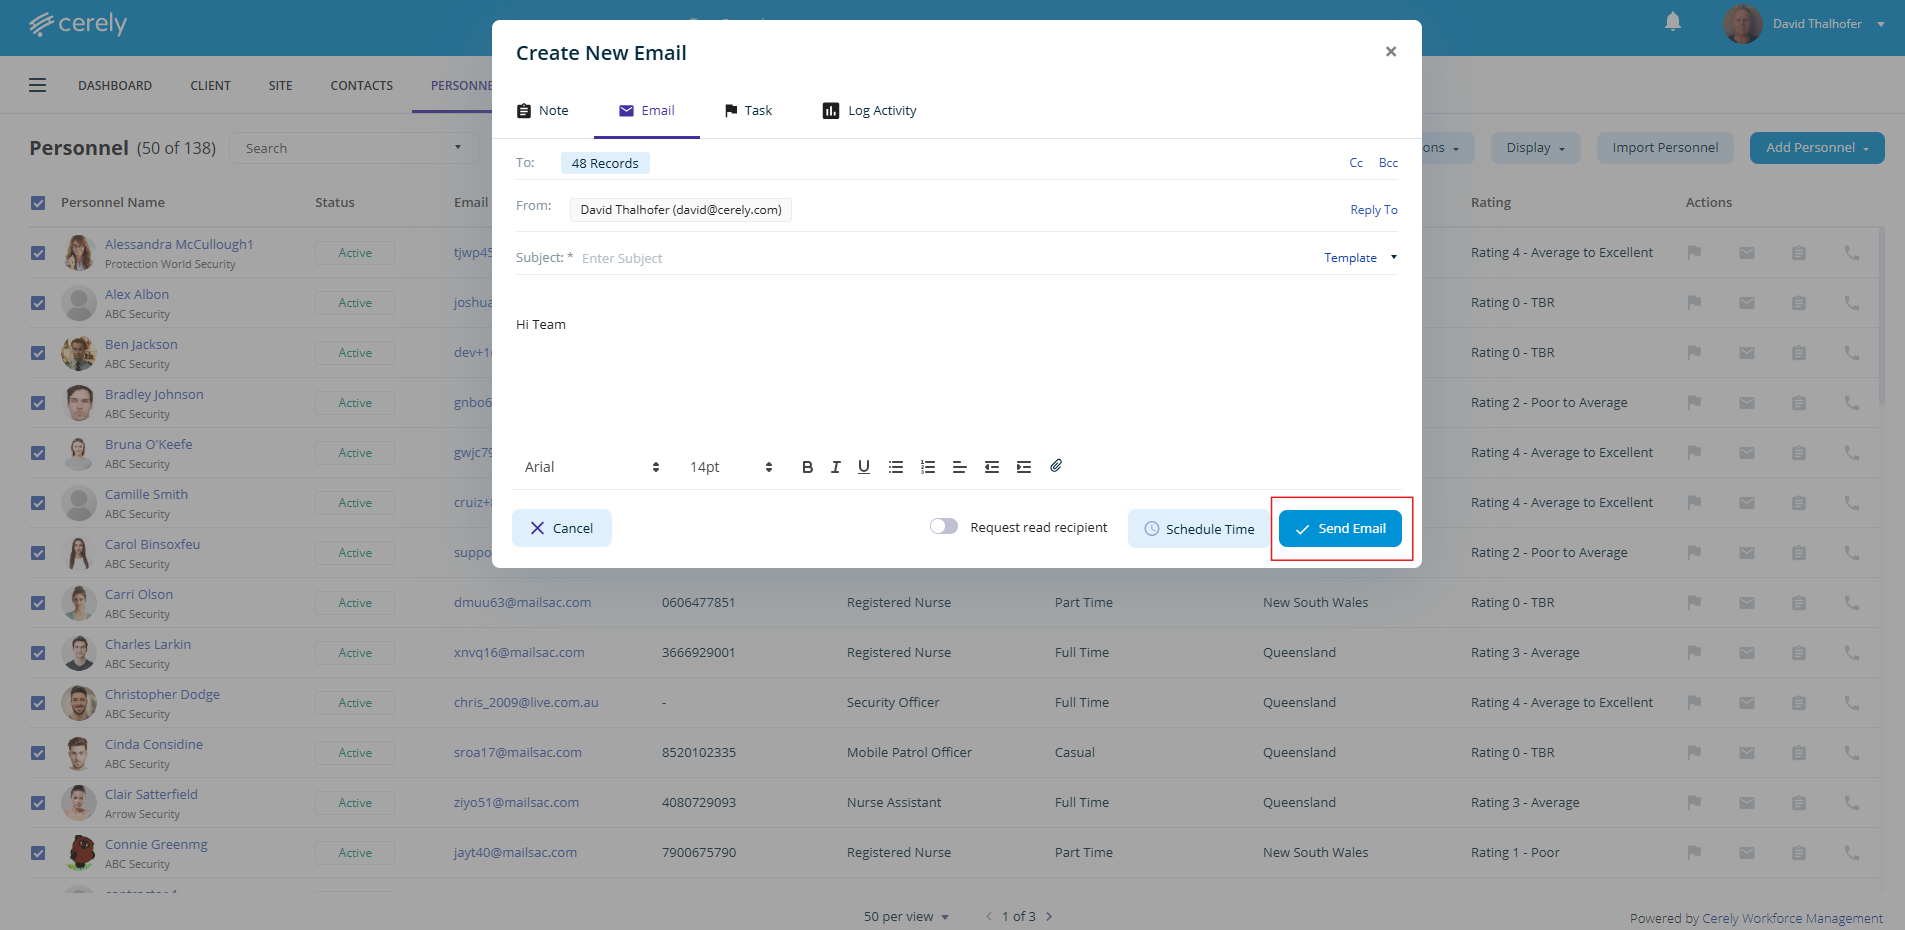
6. Once the email is written, click on Send email
Note: Once the email is sent, a record will automatically appear in the activity timeline of each personnel profile, giving you and your team a clear audit trail of communications.