
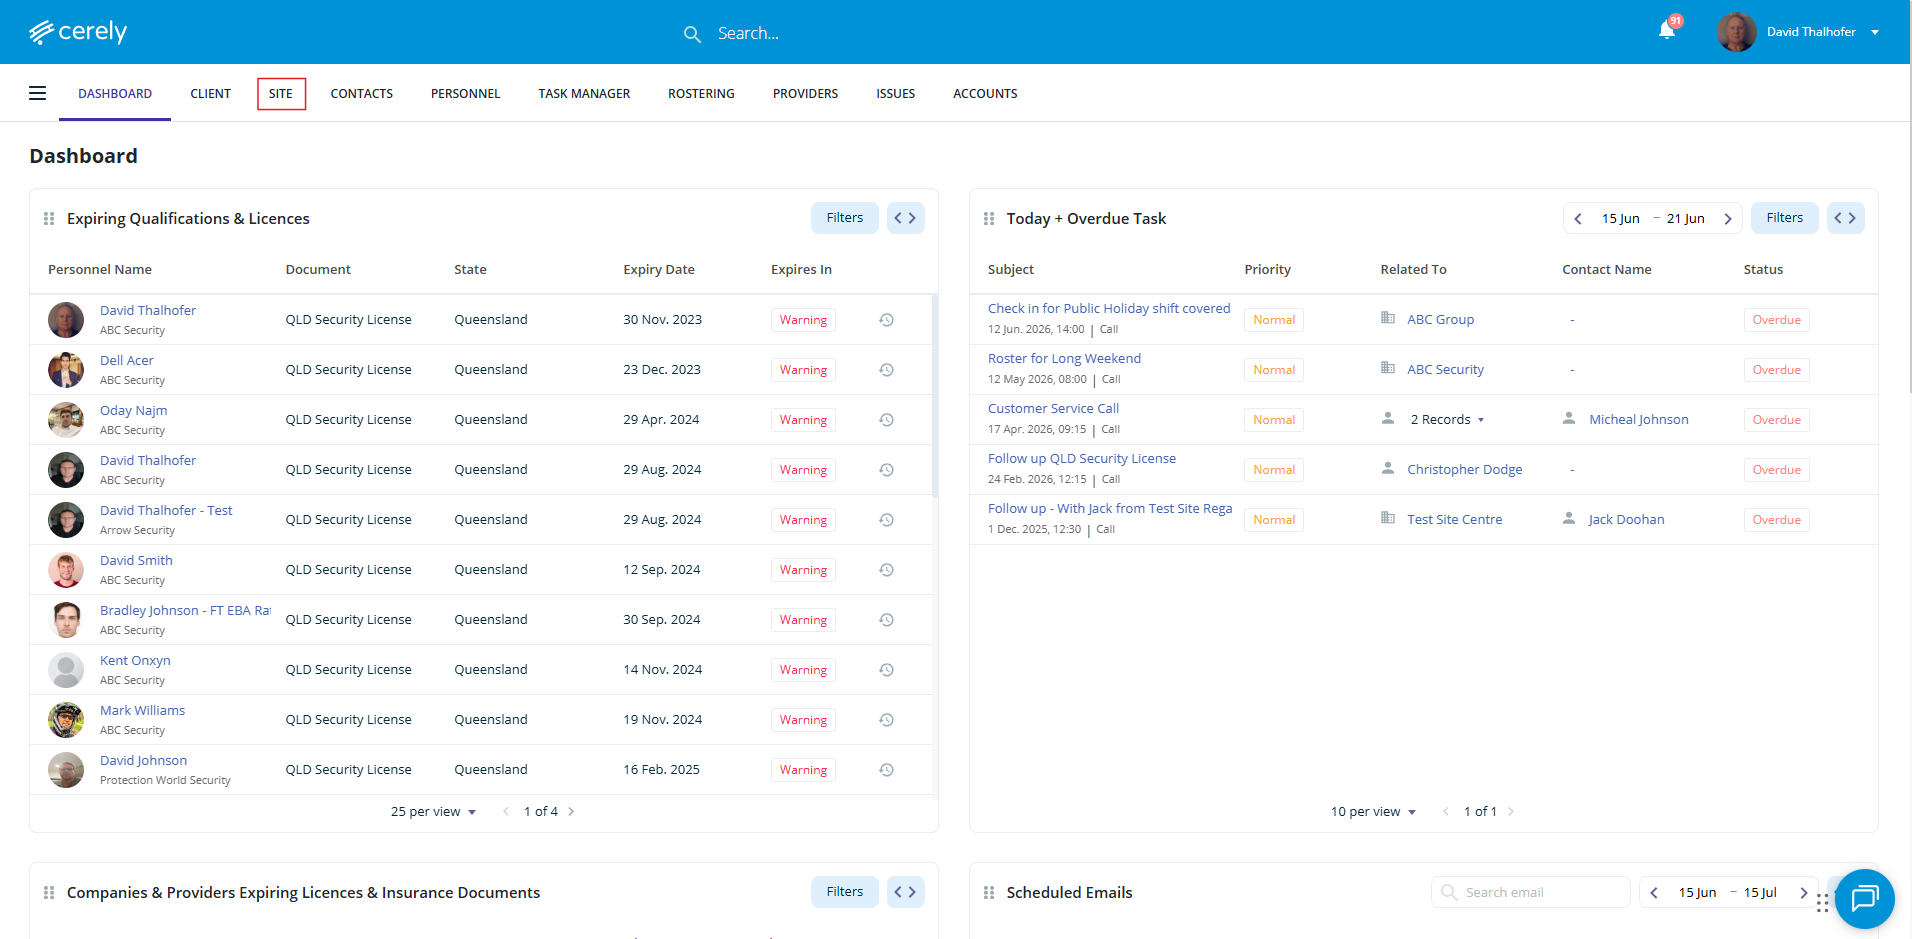
1. From the home screen in Cerely, click on the Site tab from the Cerely main menu
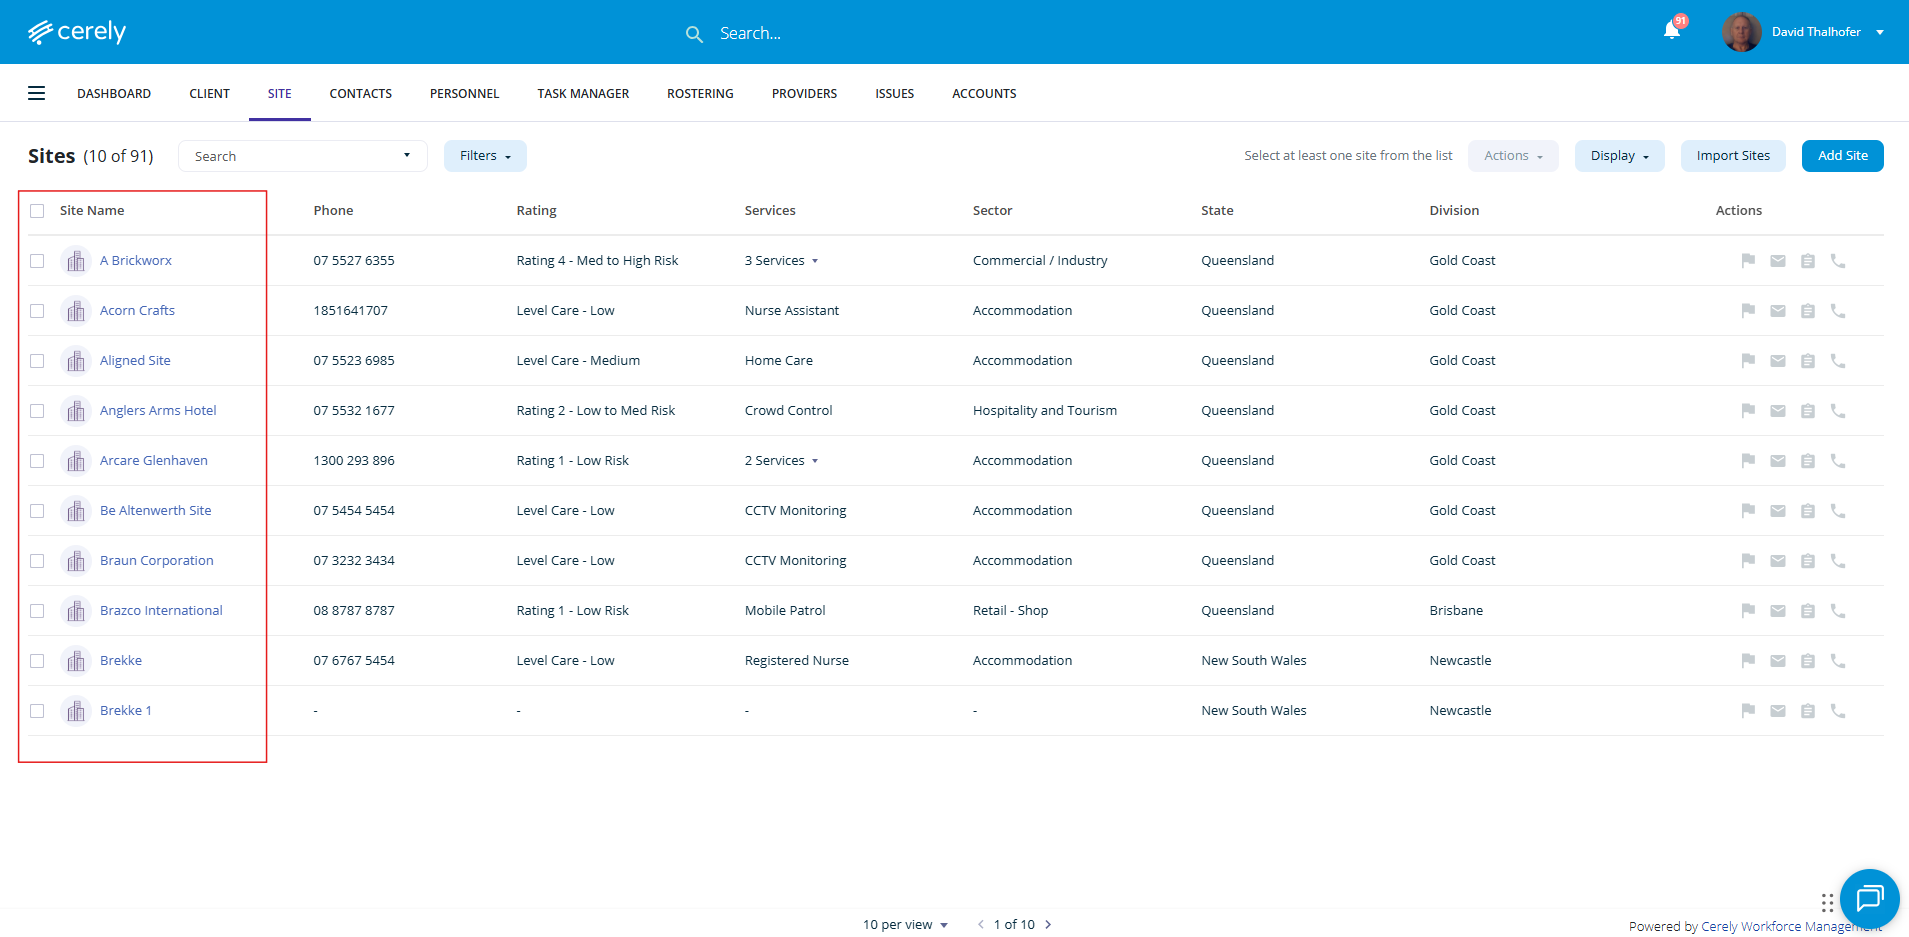
2. Select the Site you would like to add Charge Rates to from the list
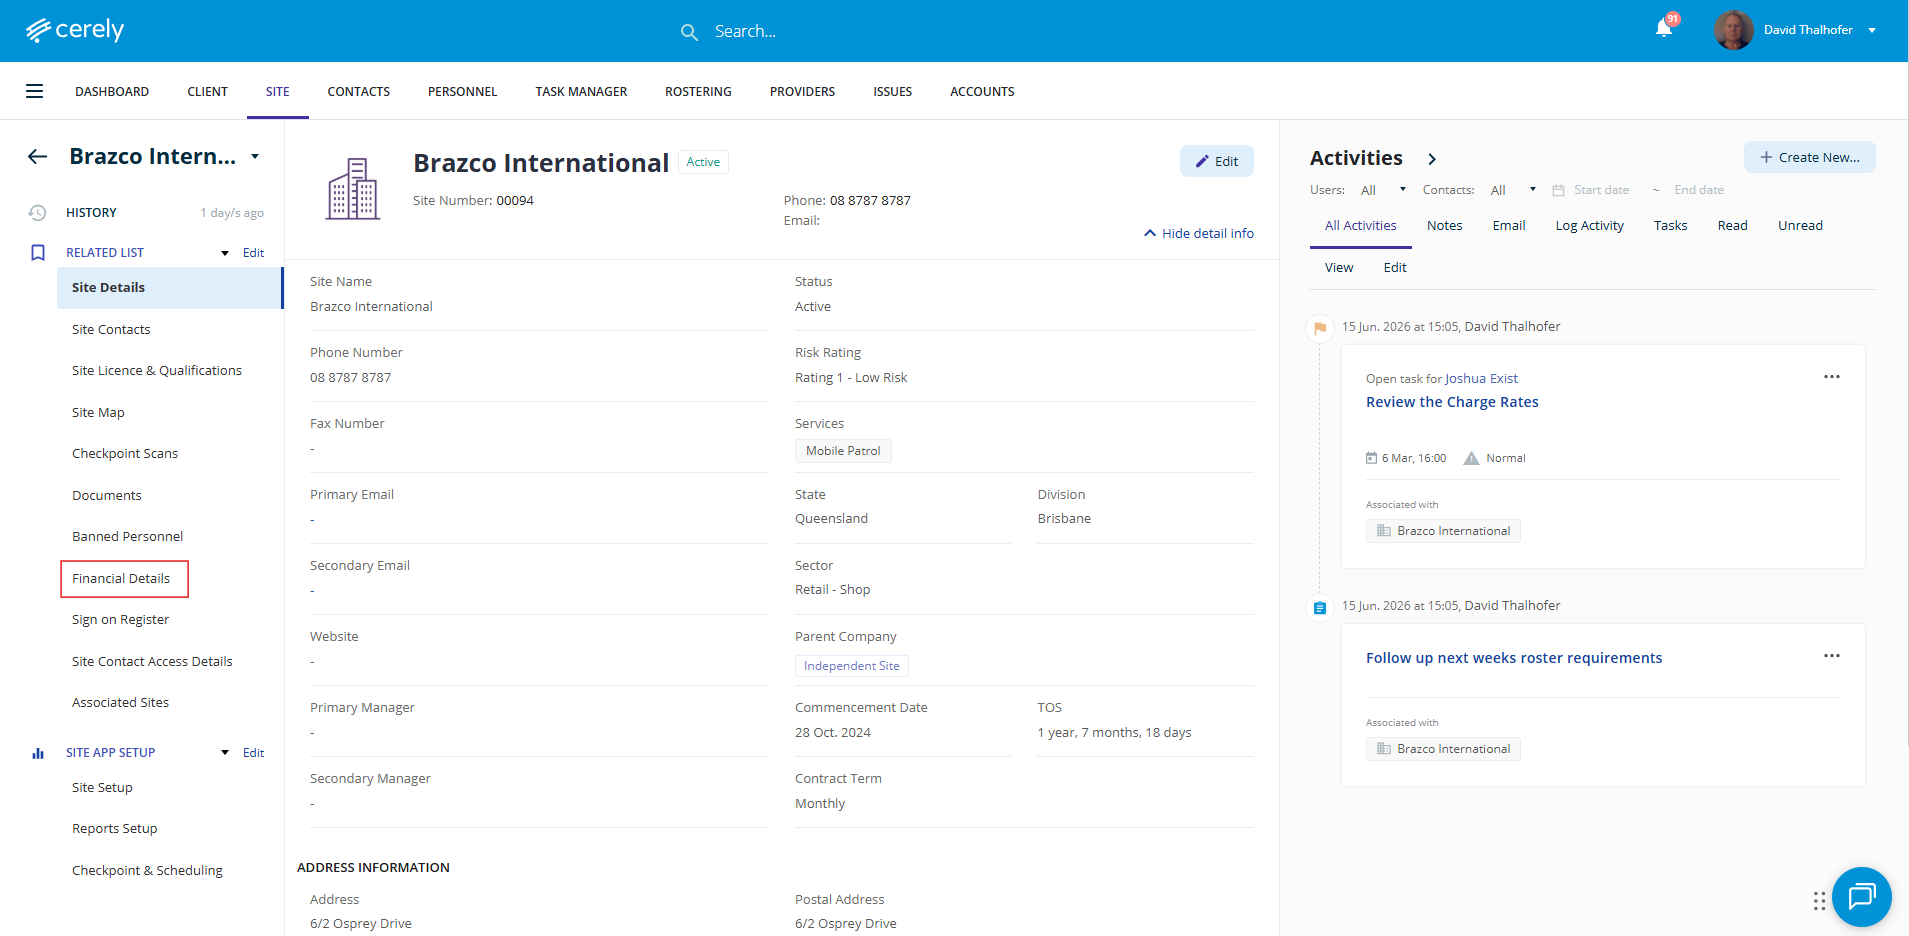
 3. From the left-hand menu, click on the Financial Details tab
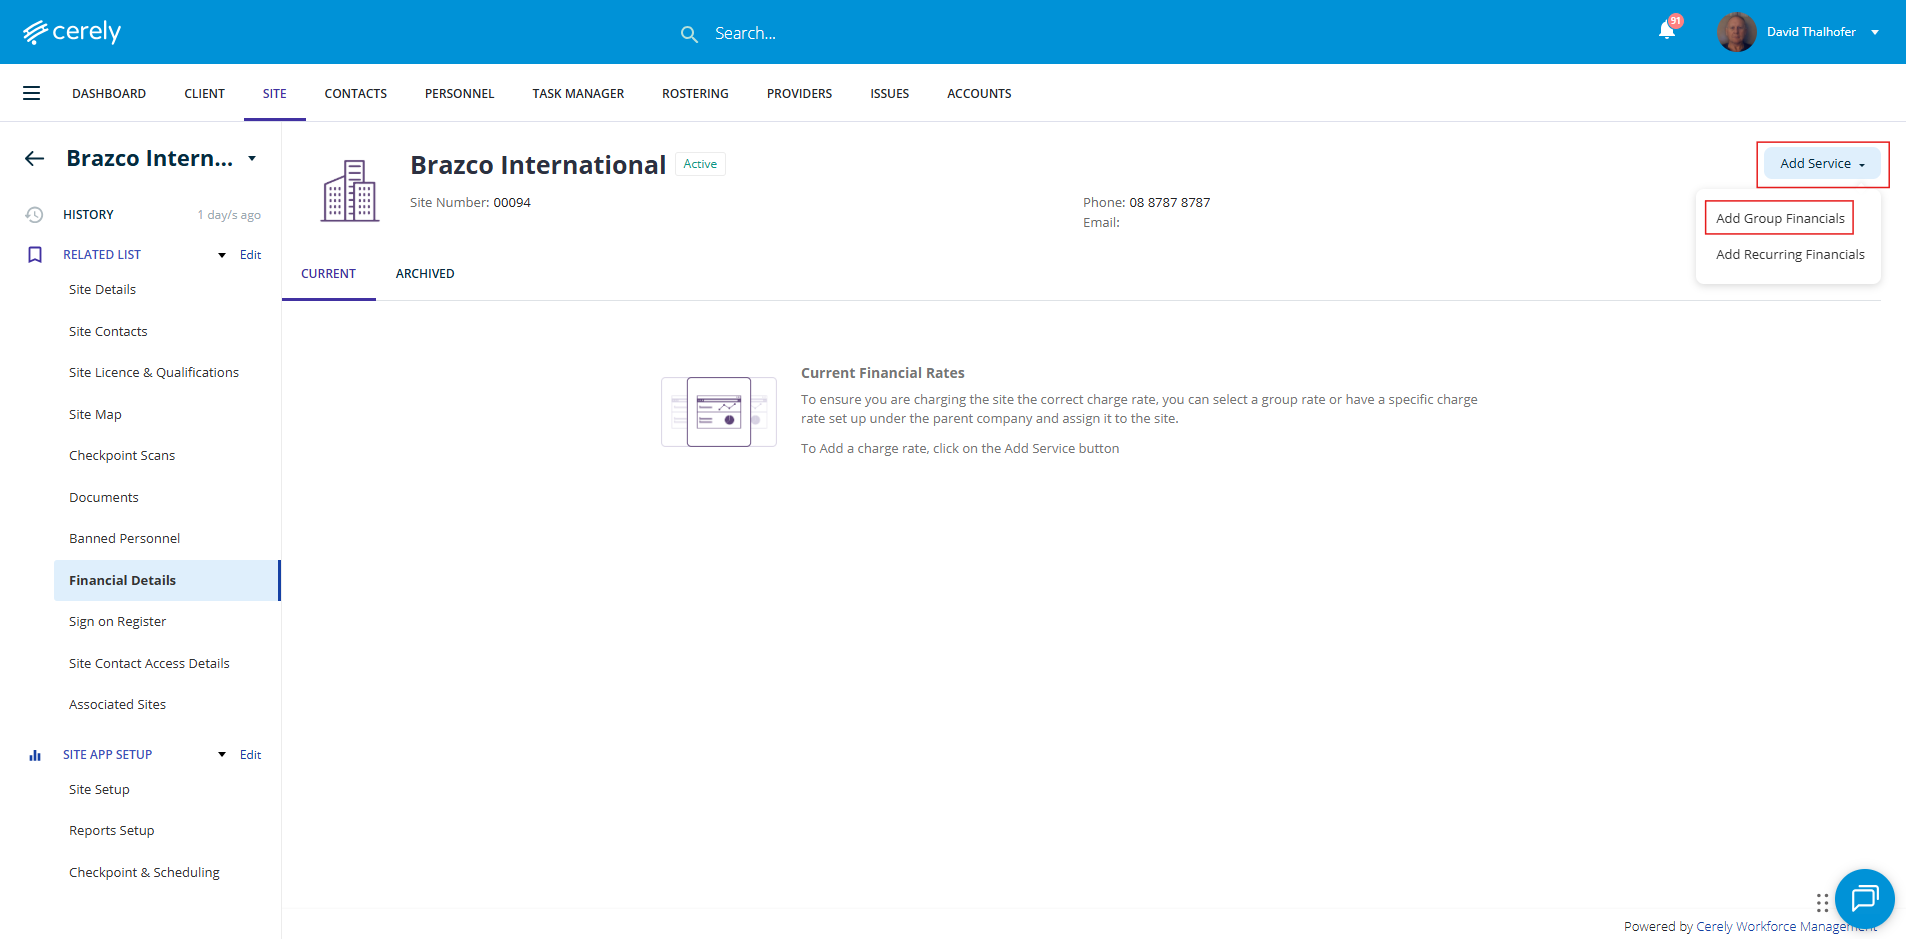
4. Click on the Add Service button on the right-hand side and then Add Group Financials from the drop down
5. Complete all fields in the Main Details section, they are mandatory and must be completed before saving the charge rate.
By default, the system will pre-fill the State and Division based on the client’s profile settings.
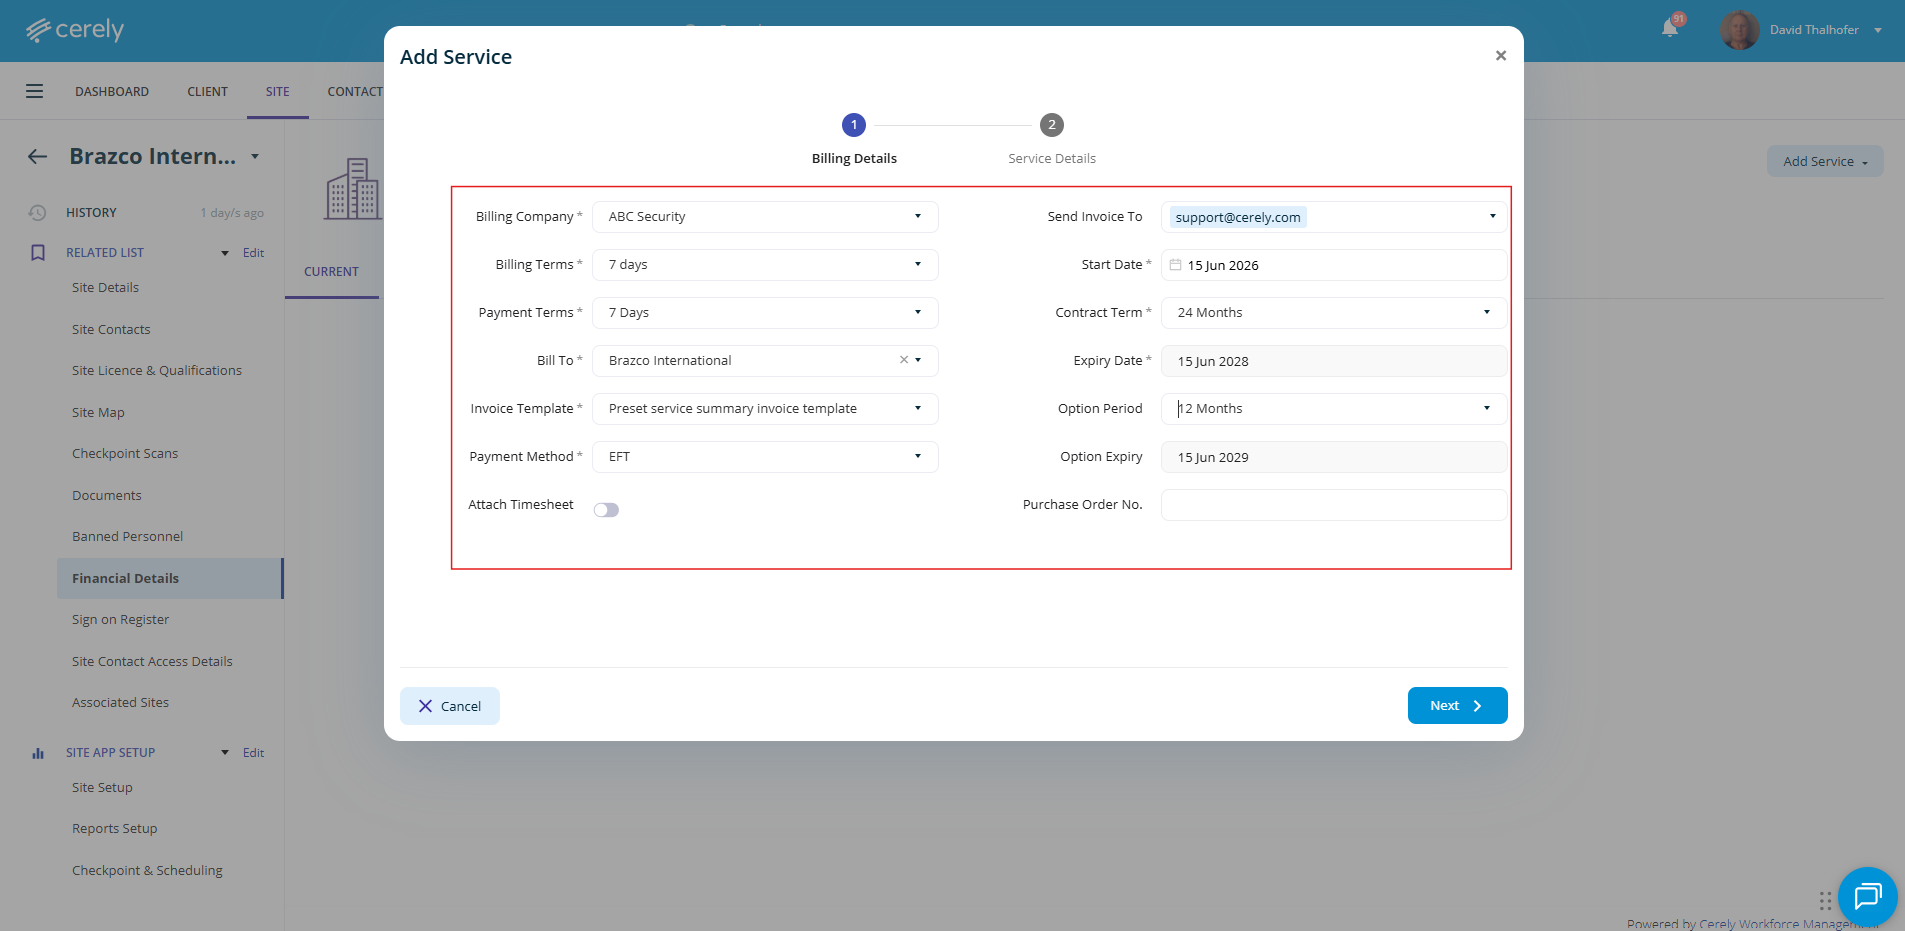
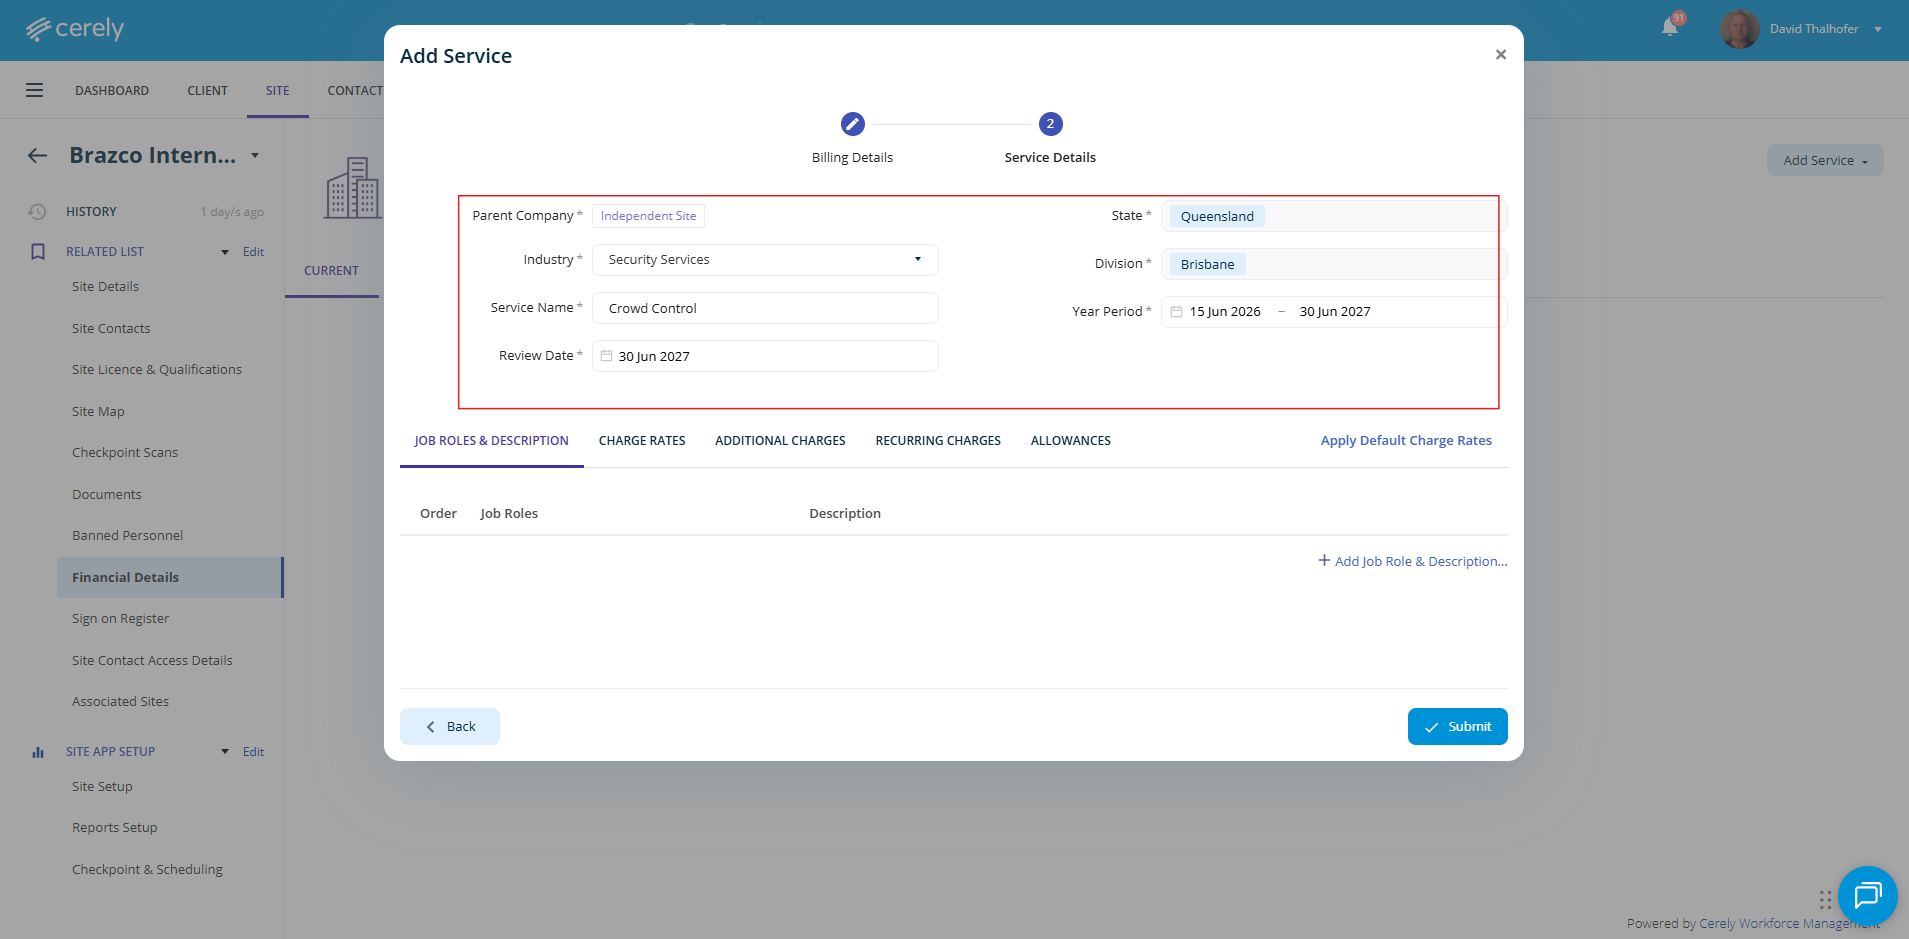
Complete all of the following fields:
- Industry - Select the relevant industry from the dropdown menu
- Service Name - Enter a clear and descriptive service name based on the service provided or geographic coverage. (e.g Crowd Control – Regional or Crowd Control – Metropolitan)
- Year Period - Select the year period the charge rate applies to
The system will notify you on the dashboard when charge rates are nearing expiry so they can be reviewed or updated.
6. Click on + Add Job Role & Description. Select from the dropdown menu the Job Role, enter a description to display for this job role.
Important: These fields will pull through to the clients invoice for billing
7. Click on the Charge Rates tab here you will enter all the relevant charge rates as per your contract with the client (e.g. Ad-Hoc, All Shift Types or Permanent Shifts)
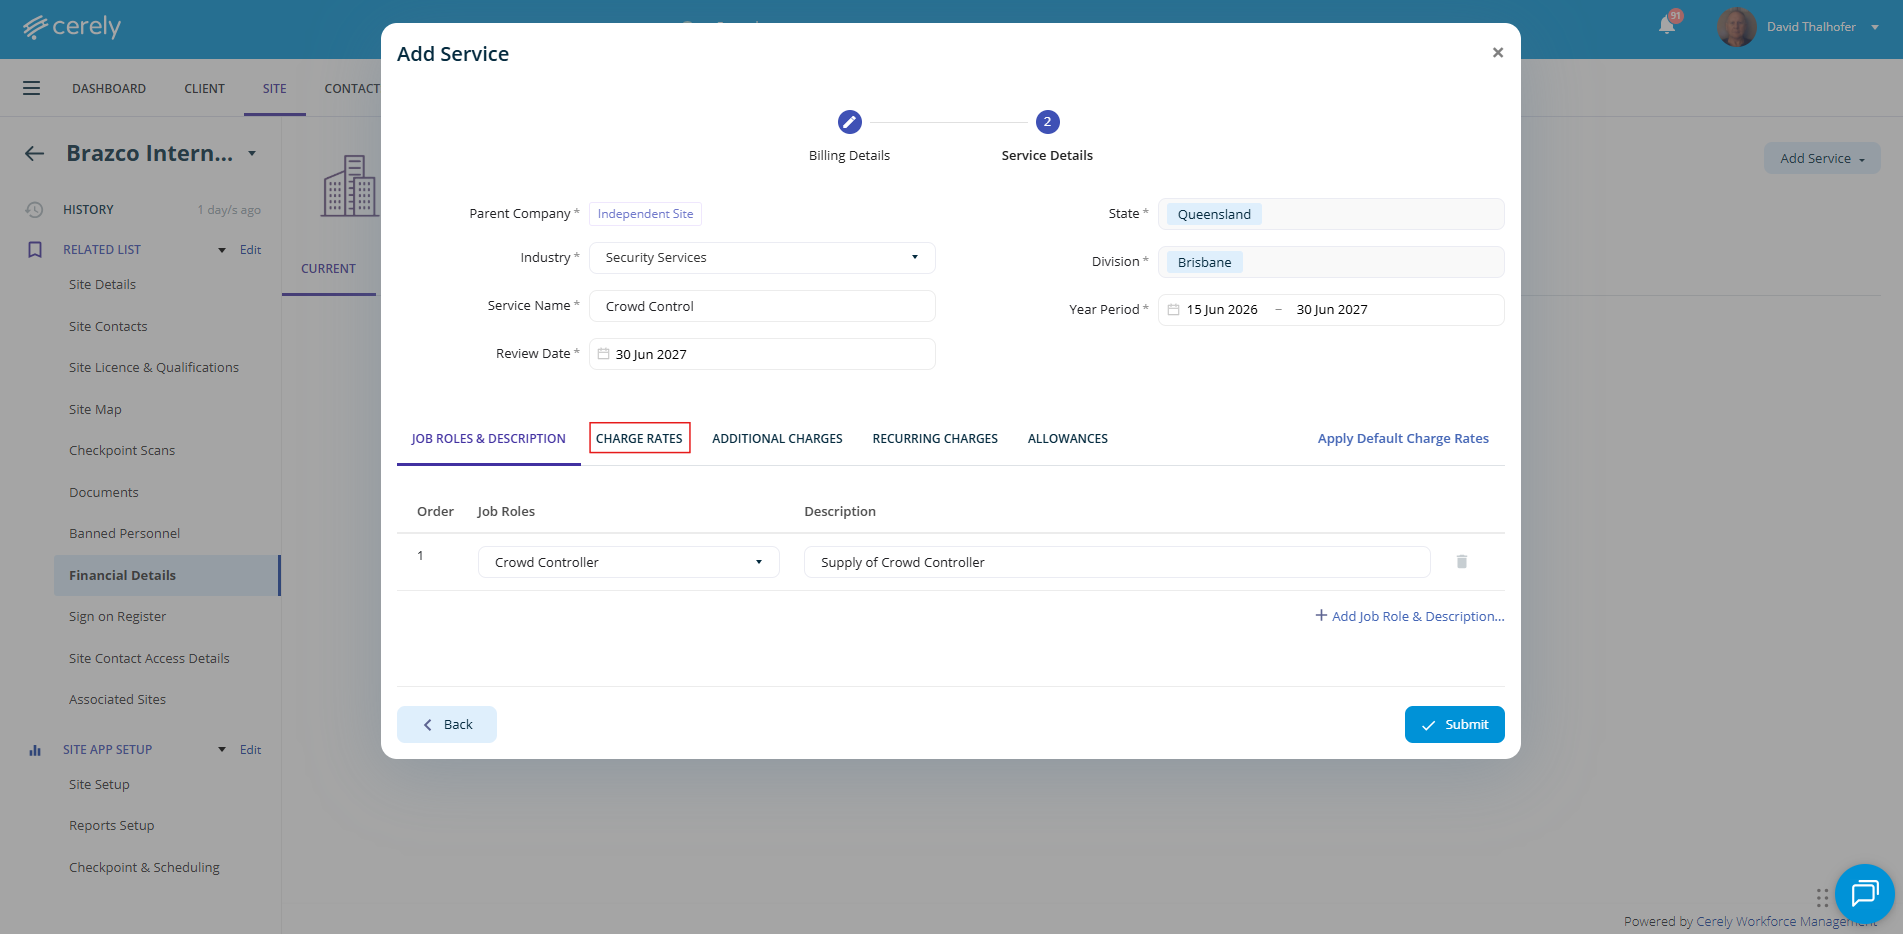
This is where you will enter all relevant Charge Rates as per your agreement with the Site.
8. Click on + Add Charge Rates to begin configuring the Charge Rates
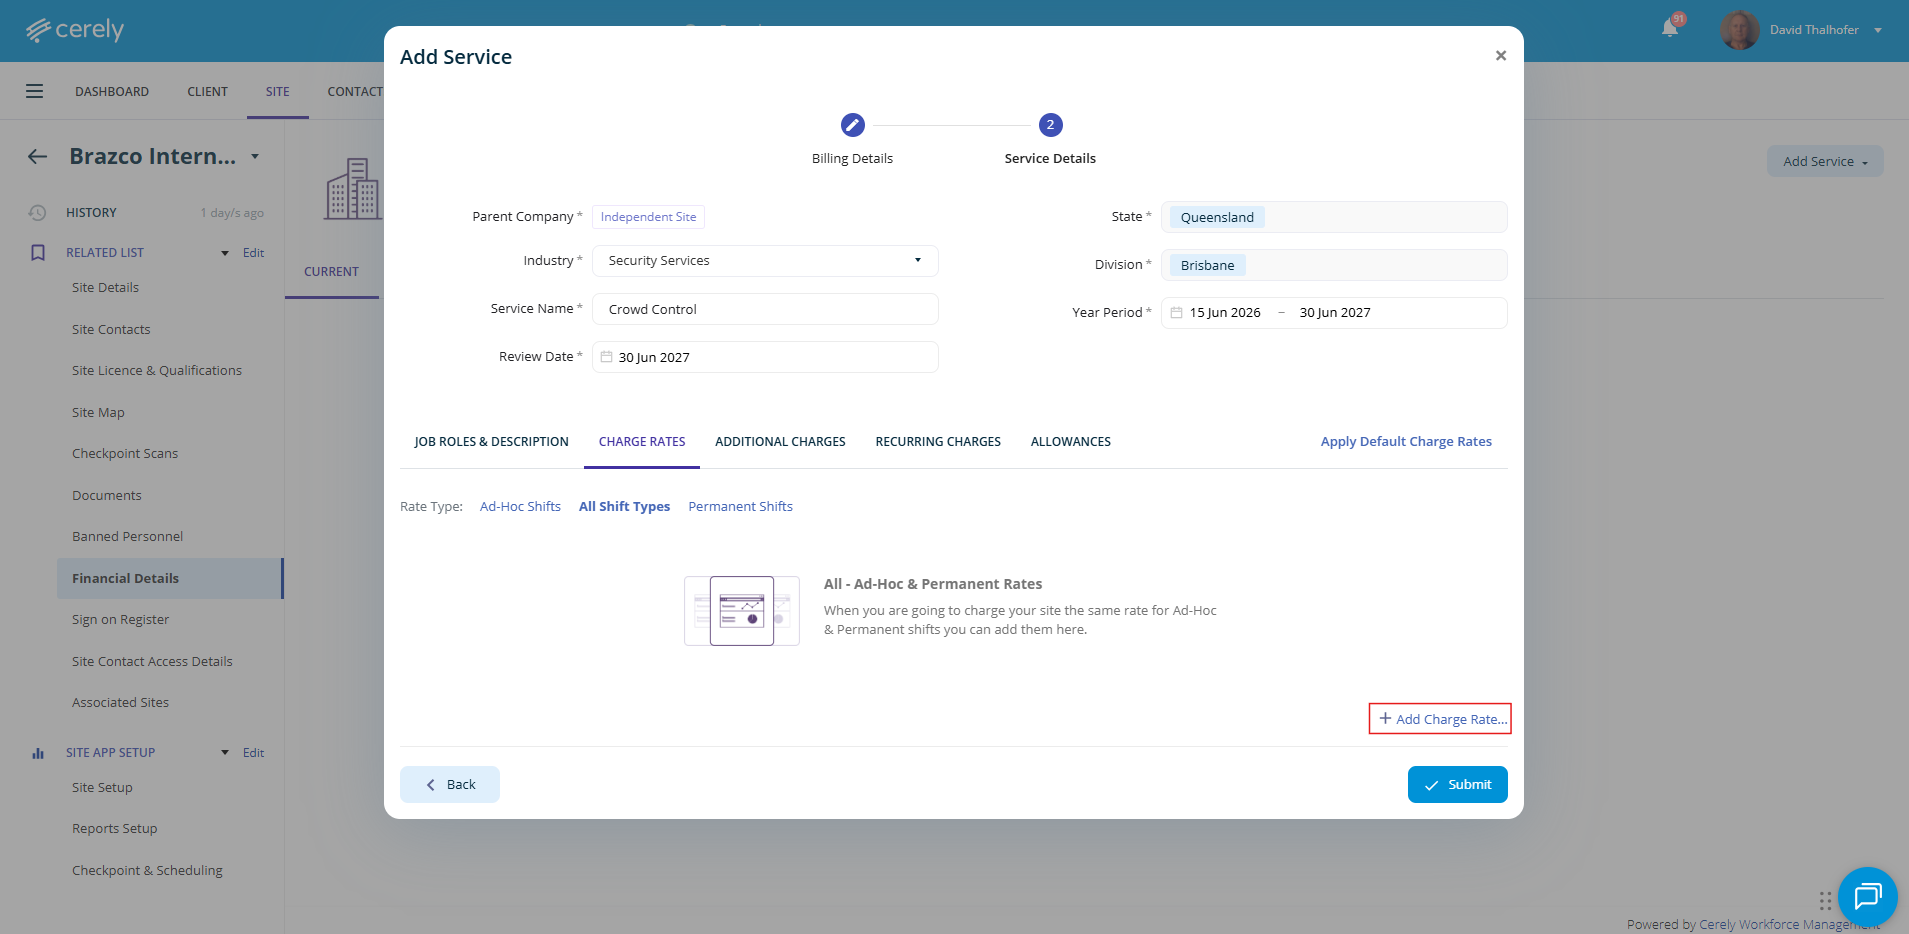
Enter a charge rate code that matches your accounting system (e.g. MYOB or Xero), then select the relevant Job Role from the dropdown menu.
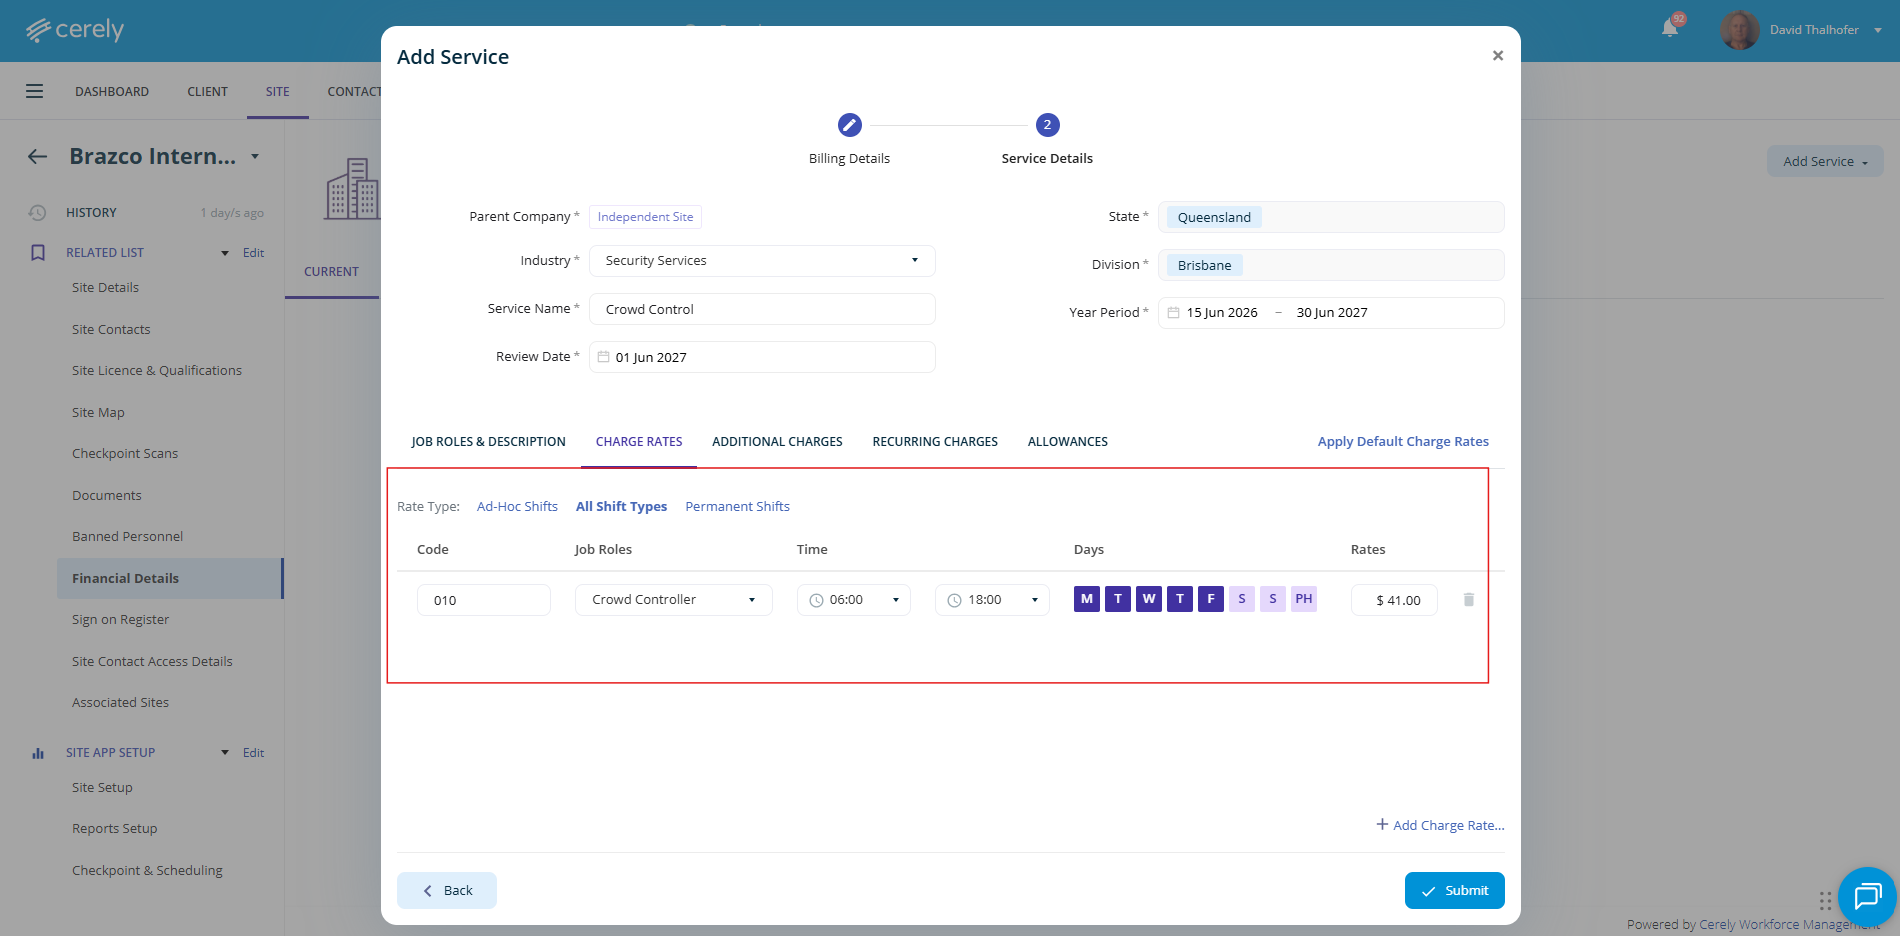
Next, define when the charge rate applies by setting:
- Start and end times
- Applicable days
Once configured, enter the dollar value for the charge rate.
If Ad-Hoc Shifts and Permanent Shifts are charged at the same rate, then you can apply this to the system as an All Shift Types rate. If different rates apply, you can configure separate charge rates for Ad-Hoc and Permanent shifts as required.
You can also add multiple charge rates to cover different scenarios, including:
- Weekday rates
- Weekend rates
- Public holiday rates
- Night shift or after-hours rates
This flexibility ensures client billing remains accurate across all shift types and conditions.
Article links
-
How to find your codes in MYOB Accounting System
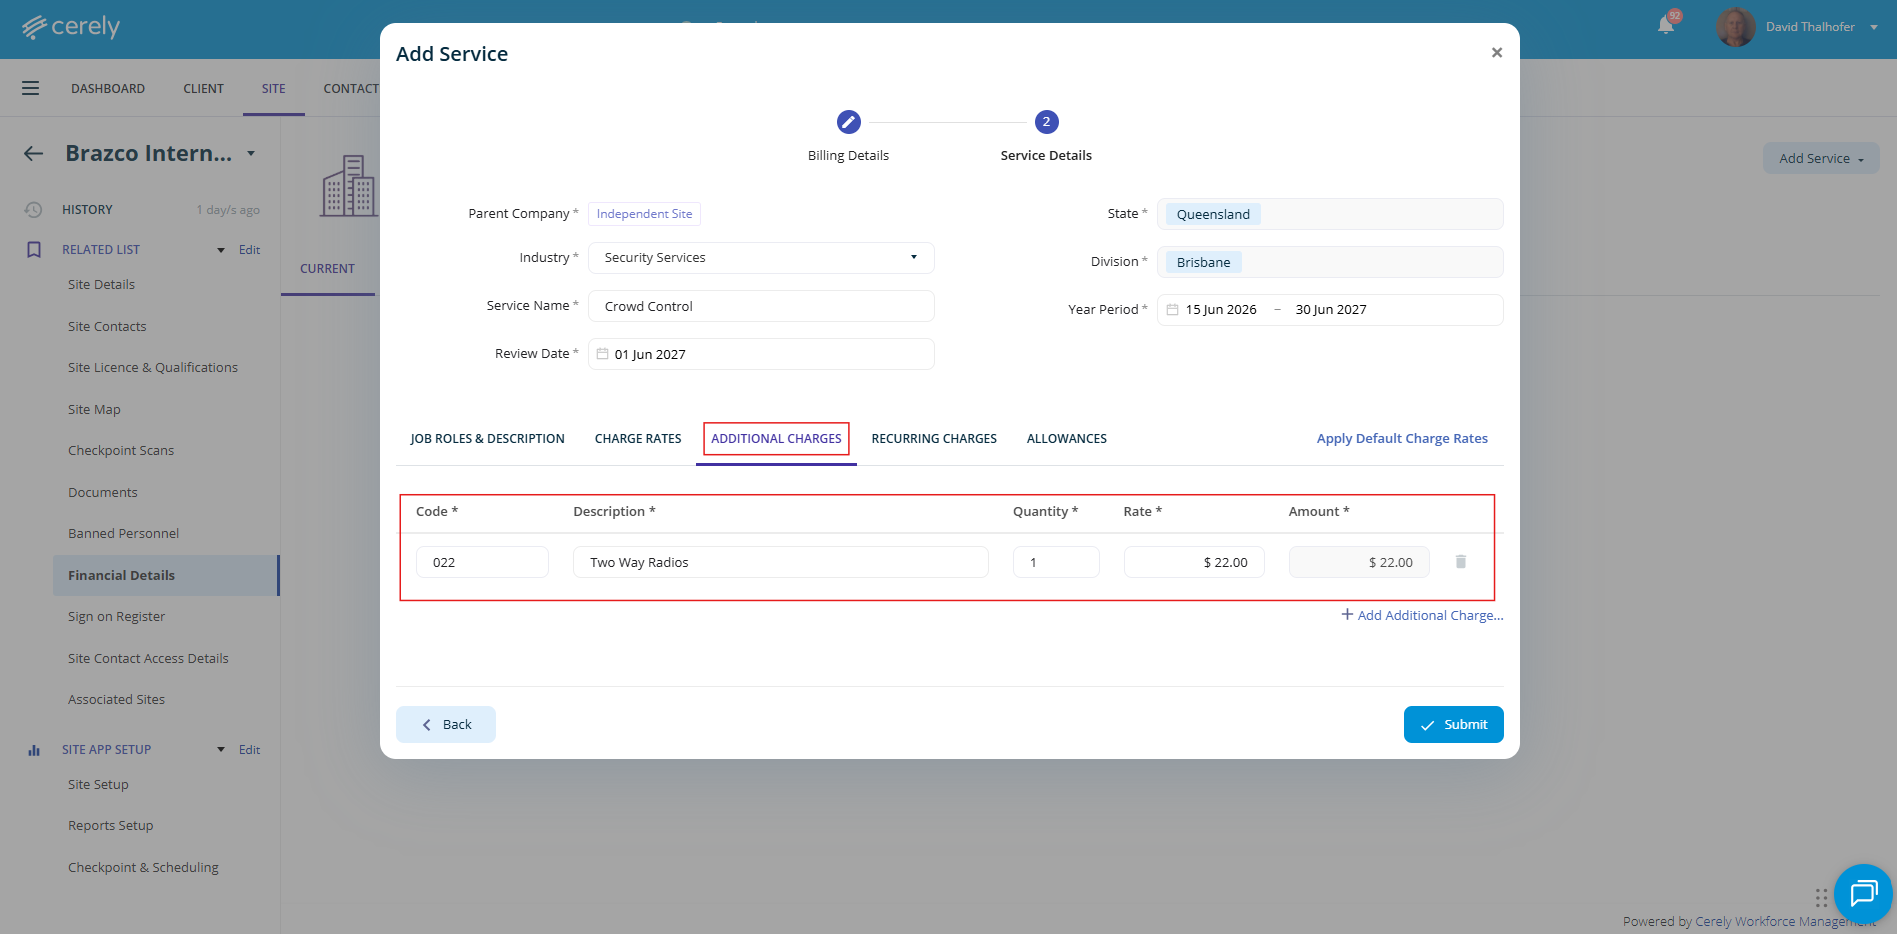
9. Include any additional charges (e.g., two-way radios) under the additional charges tab and click +Add Additional Charges
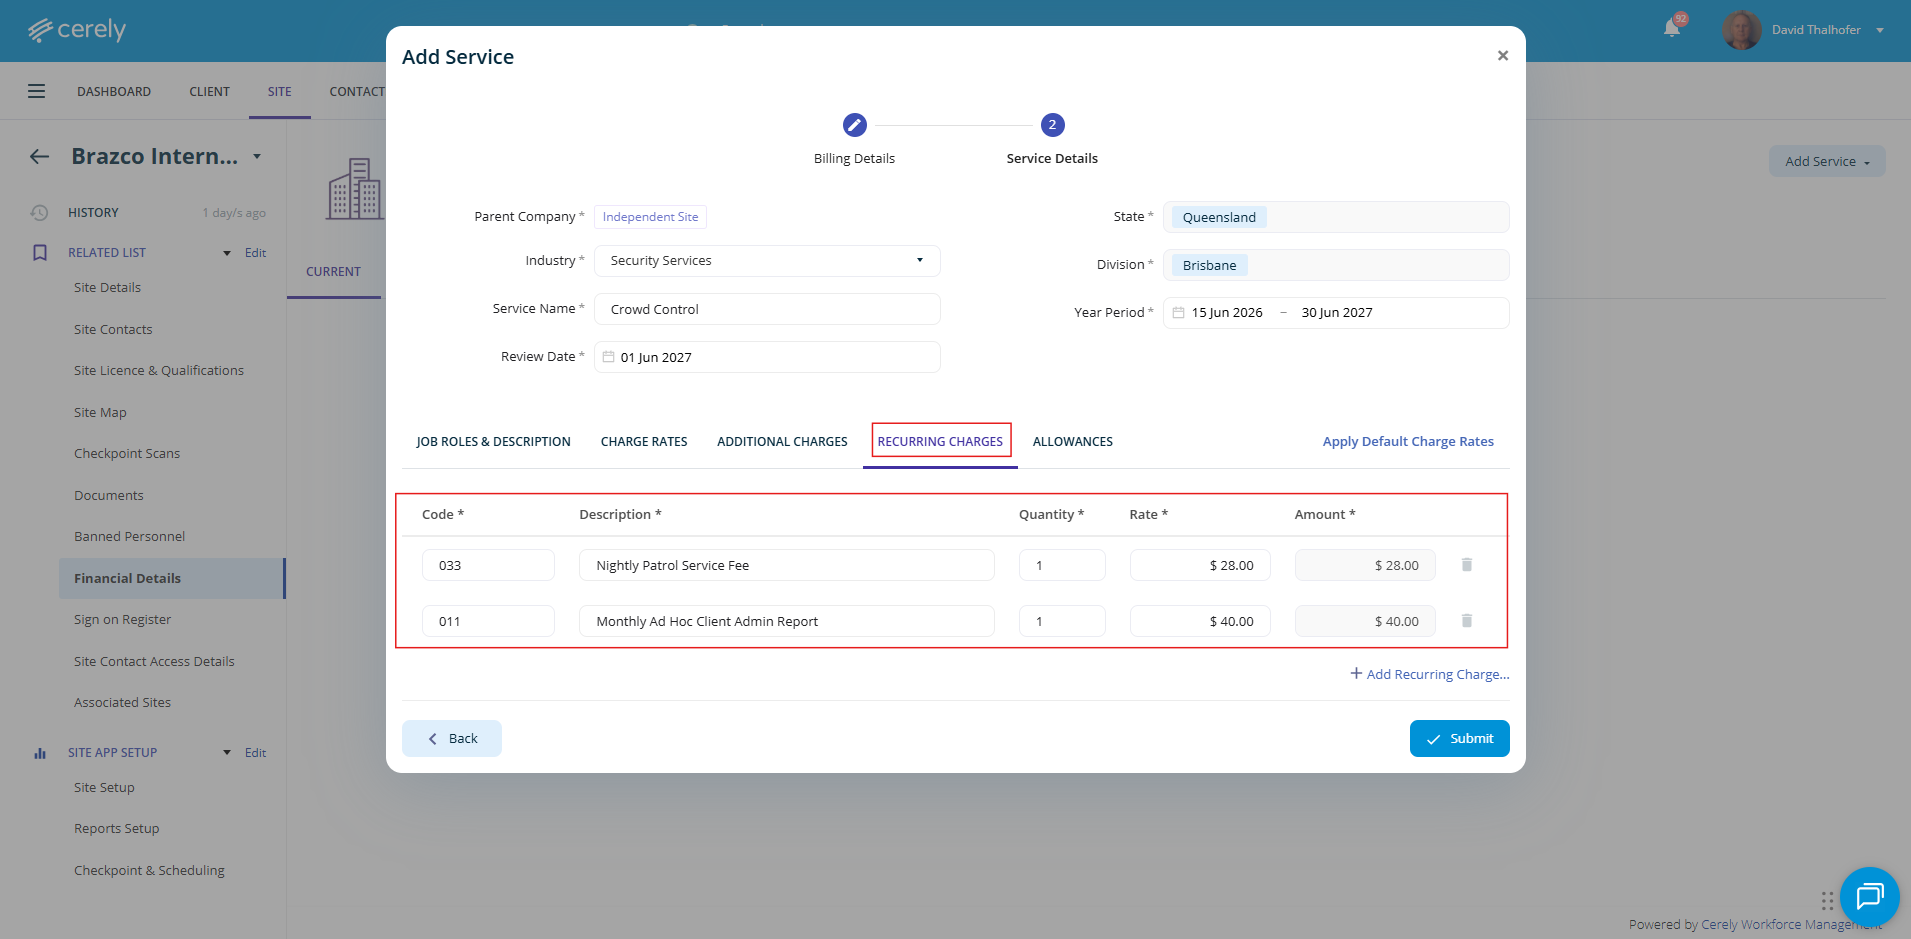
10. Enter any recurring charges—these are billable items regardless of whether a guard or shift is scheduled (e.g. recurring monthly invoices)
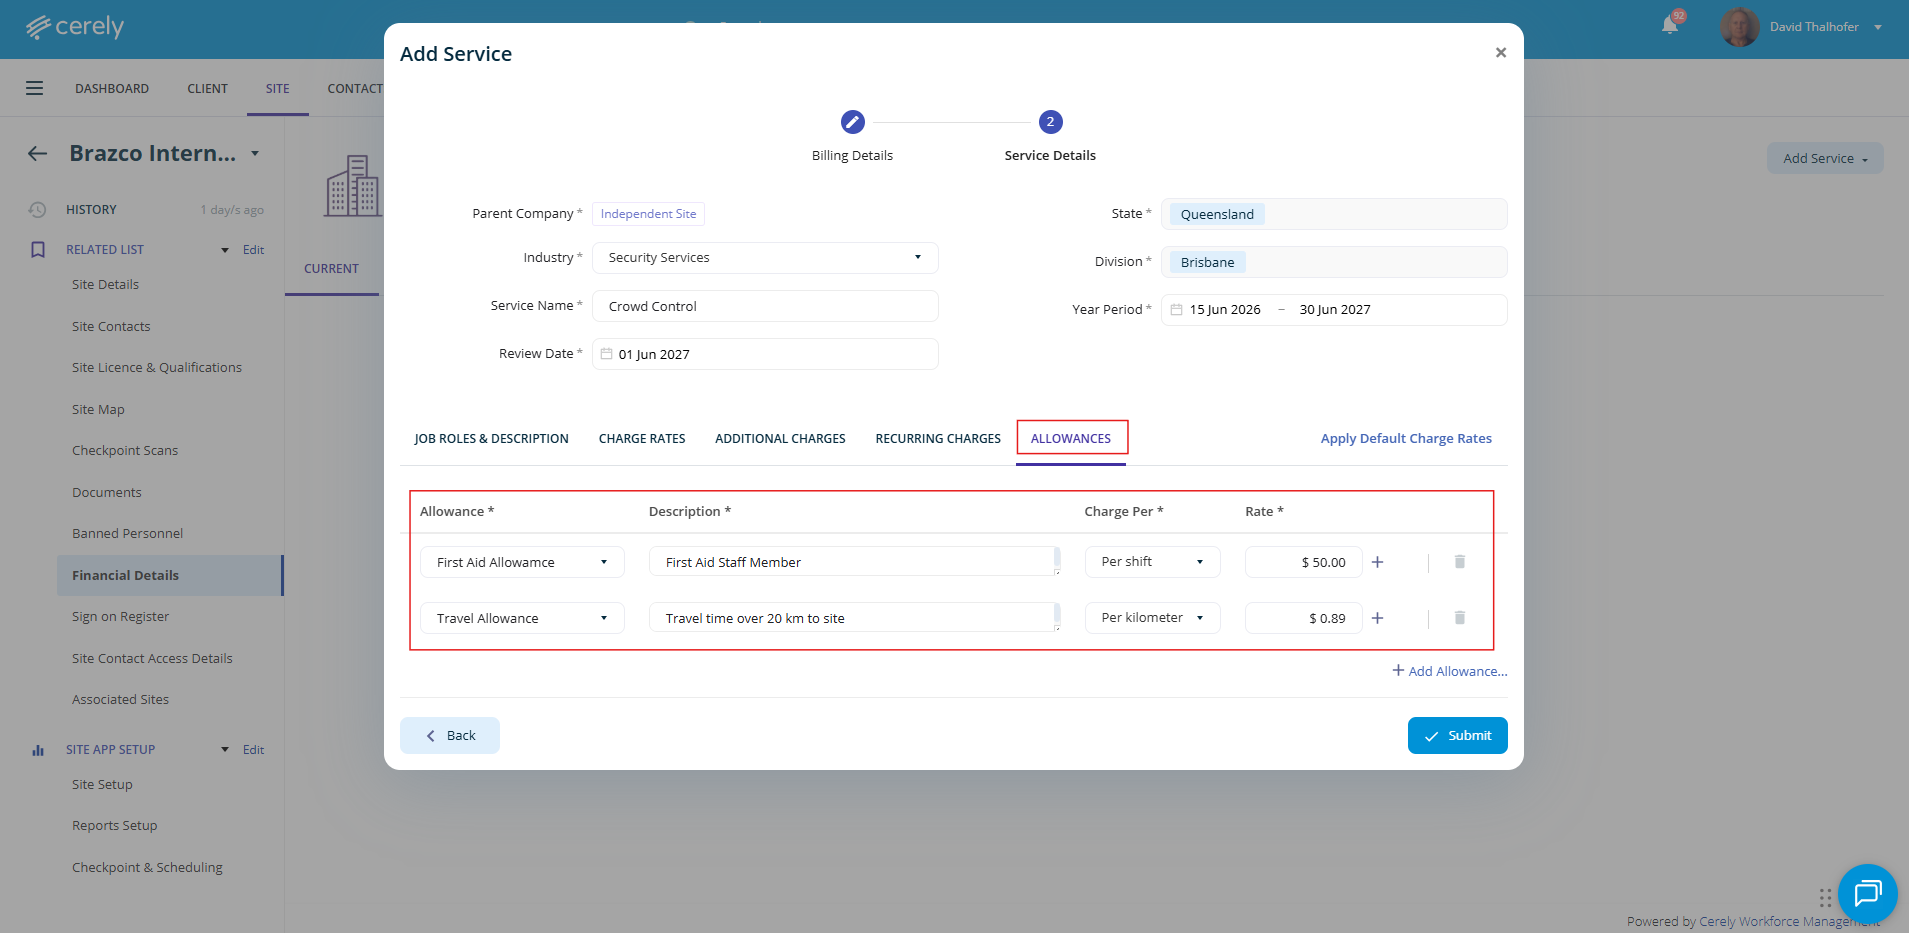
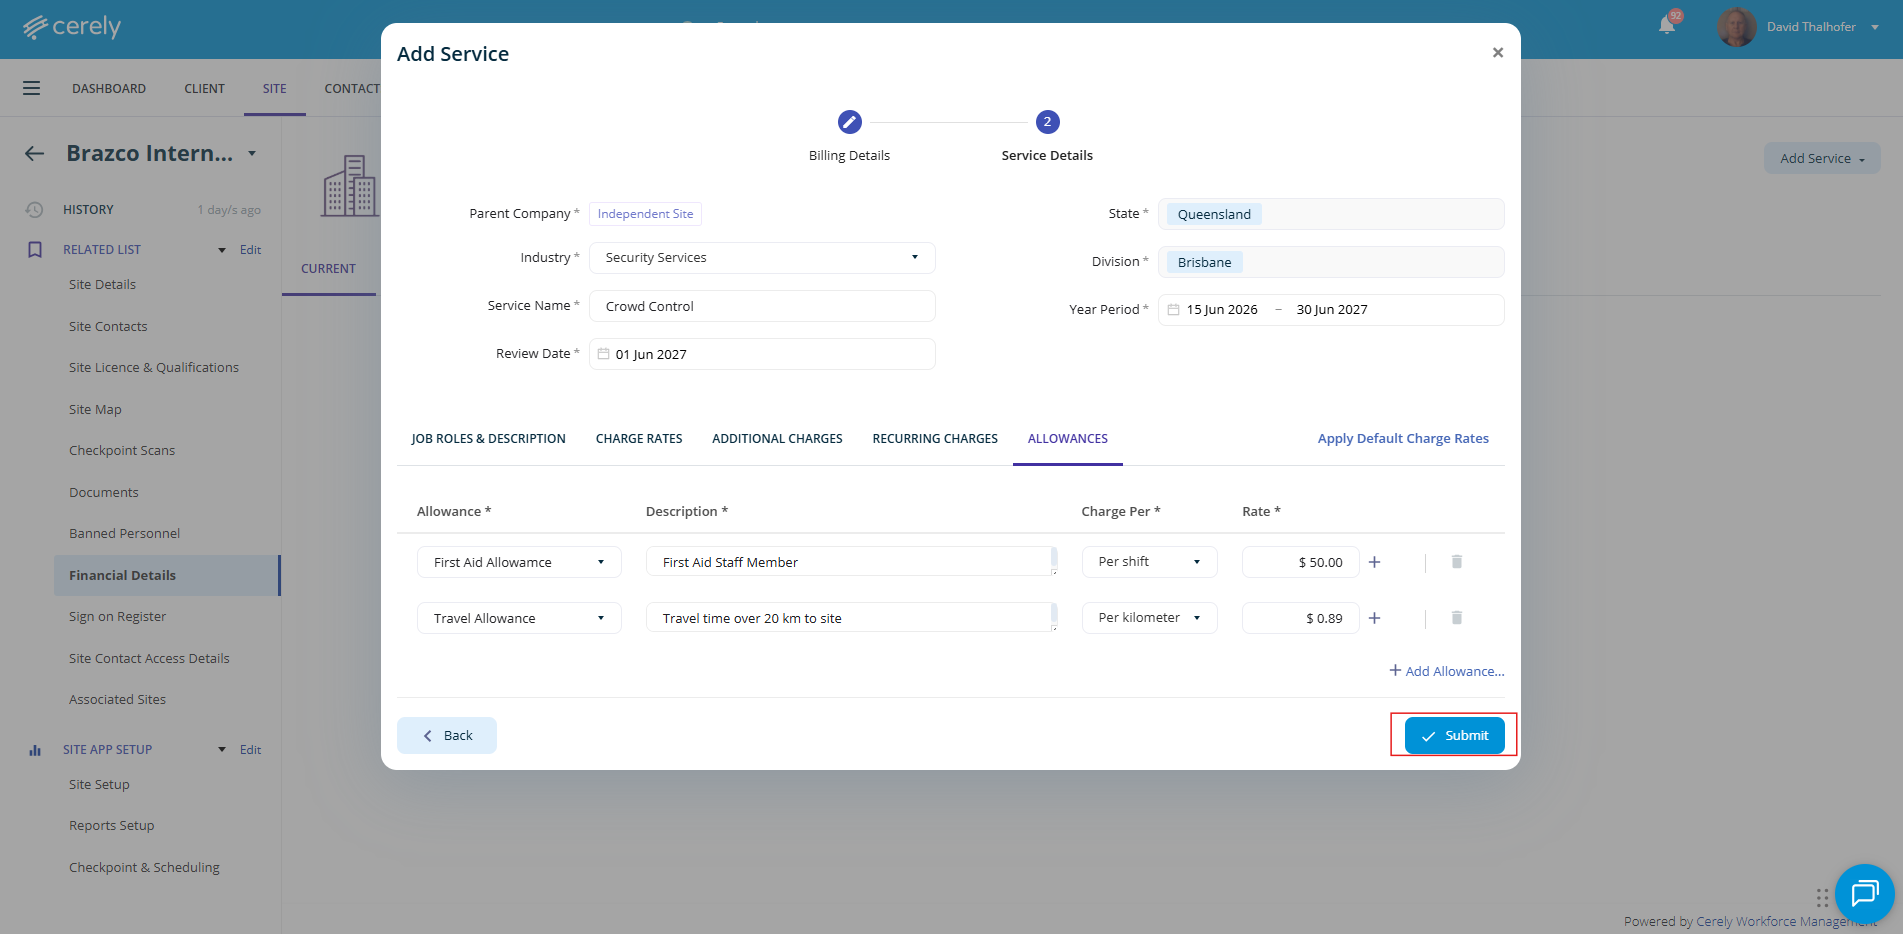
11. Specify and add any applicable allowances (e.g. travel allowance, food allowance)
12. Click on the submit button
The charge rates will now display in the client's financial details list